Highland – Tuto snood tricoté avec le gros point de vannerie
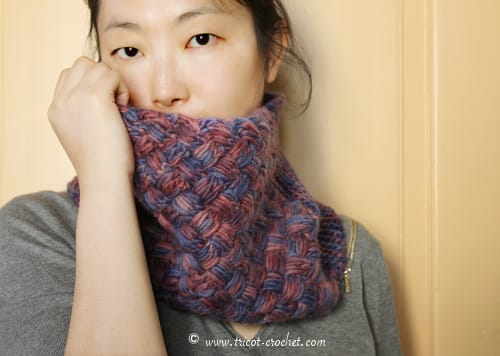
Je viens de faire un super snood avec de la laine que j’ai teinte moi-même. Je suis contente de résultat. Il est assez épais et me tient bien chaud. Maintenant, je veux qu’il fasse froid, froid… 🙂
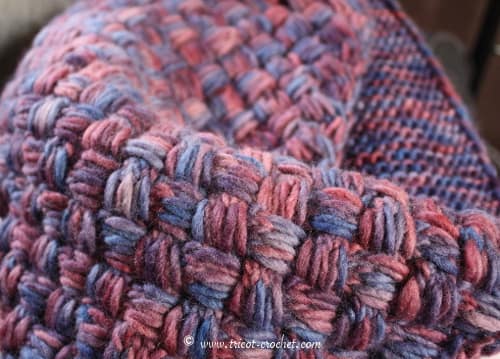
Pour ce snood, le point fantaisie est basé sur le point de vannerie, mais en plus gros. Je l’appelle le gros point de vannerie. C’est un point bien adapté pour la laine épaisse.
Tutoriel – Highland snood
Type de laine : Bulky
Aiguille : 6mm
Métrage : 200m / 218 yds
Échantillon : 18 mailles = 10cm en jersey
Techniques requises : Savoir tricoter une torsade
Astuces de taille : Pour avoir une largeur plus petite ou plus grande, il suffit de diminuer ou d’augmenter les mailles par 6.
Taille final du snood : 72 cm x 27 cm
Abréviation :
m : maille(s)
T6Dev : torsade de 6 mailles de droite à gauche à l’endroit
T6Der : torsade de 6 mailles de gauche à droite à l’endroit
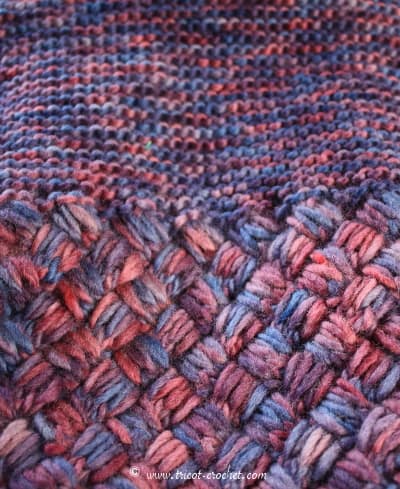
Notes : Ce snood est tricoté à plat, puis cousu en cercle. Il contient 2 parties, une 1ère partie avec le gros point de vannerie, une 2e avec le point de mousse. Vous pouvez doubler la longueur pour faire 2 tours sur le cou.
- Montez 53m (6×8+5). Il faut un nombre de m multiplié par 6, puis ajouté 5.
1ère partie :
- Rang 1 : glissez la 1ère m. Tricotez toutes les m à l’envers et enrouler le fil deux fois autour de l’aiguille au lieu de 1 fois, jusqu’à ce qu’il reste 1m. 1m envers normal pour cette dernière.
- Rang 2 : glissez la 1ère m. 8 fois T6Dev. 4m endroit.
- Rang 3 : répéter rang 1.
- Rang 4 : glissez la 1ère m. 3m endroit. 8 fois T6Der. 1m endroit.
- Répéter 12 fois du rang 1 à rang 4.
2e partie :
- Rang 1 : Vous devez faire une diminution, sinon votre travail va s’élargir avec le point mousse. Glissez la 1ère m comme pour la tricoter à l’envers. *2m ensemble endroit, 1m endroit, 2m ensemble endroit, 2m endroit*, répéter ** 7 fois. Puis 2m ensemble endroit. 1m endroit.
- M endroit pour tous les rangs (endroit et envers) jusqu’à la même longueur que la 1ère partie.
- Rabattez les m. Laissez un bout de fil assez long pour coudre.
Maintenant, à vous de jouer !
I just did a super cowl with the yarn that I dyed myself. I’m happy with the result. It is quite thick and will keep me warm. Now I want it cold, cold … 🙂
For this cowl, the stitch is based on the basket stitch, but more large. I call it the big basket stitch. It is a stitch adapted well to the bulky yarn.
Pattern – Highland Cowl
Yarn : Bulky (my dye)
Needles : 6mm
Yardage : 200m / 218 yds
Gauge : 18 st = 10 cm / 4’’ in stockinette stitch
Skills needed : Know how to knit a cable
Sizing tips : To have a smaller or bigger width, it is enough to decrease or to increase stitches per 6.
Final size of this cowl : 72 cm x 27 cm
Abbreviation :
St : stitch(s)
C6L : 6-st cable left
C6R : 6-st cable right
Notes : This cowl is knitted as one flat piece and then sewn into a circle. It contains two parts, the first part with the big point baskets, and the second with the garter stitch. You can double the length to turn two times on the neck.
- Cast on 53 (6×8+5). You need a number of st multiplied per 6, and then added 5.
Part 1 :
- Row 1 : Slip the first st. Purl all st and wrap the yarn twice around the needle instead of once, until there is one st. And purl normally the last st.
- Row 2 : Slip the first st. Knit 8 times C6L. Knit 4.
- Row 3 : Repeat the row 1.
- Row 4 : Slip the first st. Knit 3. Knit 8 times C6R. Knit 1.
- Repeat 12 times from row 1 to row 4.
Part 2 :
- Row 1 : You have to make a decrease, otherwise your work is going to widen with the garter st. Slip the first st purlwise. *Knit 2 st together, knit 1, knit 2 st together, Knit 2*, repeat **7 times. Knit 2 st together. knit 1.
- Knit all rows (front and back) until the same length as the first part.
- Bind off. Leave a long tail of thread to sew.
Now it’s your turn!








je cherche le point de tresse magique si oui pouvez vous me l’envoyer merci
Je ne vois pas le quel. Avez vous une image de cela ?
C »st superbe, j’adore =)
Tant la laine que le point, qui est très original.
très joli point
Trop beau!!!
J’adore tes créations!
太漂亮了!
谢谢 🙂
Wahou il est super ce snood… La point, la laine.. J’adore !
Waouh superbe réalisation
Bravo oce
Bonjour.
Que signifie => 8xT6 Dev ?
Merci pour votre réponse
Ank
Bonjour,
T6Dev est une abréviation. C’est cité plus haut, torsade de 6 mailles de droite à gauche, il faut faire 8 fois au total.
Merci de partager ce modèle bien sympathique
bonjour quelle laine avez vous utilise svp pour ce snood et sinon quelle laine puis je utiliser svp merci et bravo
Bonjour, c’est une laine que j’ai teint moi même comme précisé dans le post. Vous pouvez utiliser un fil épais, 100g=200m.
Salut!
Je ne comprend pas pas quand tu dis qu’il faut enrouler 2 fois le fil autour de l’aiguille (rang 1)
Car après on se retrouve avec 2 fois plus de mailles…
Peux tu maider ??
Merci 🙂
Bonjour,
Très jolie point et très jolie laine. Merci pour le tuto très clair (et la vidéo aussi).
Petit question, comme j’aimerais éviter une couture pour faire le snood, pensez-vous que l’on peut tricoter en aiguille circulaire en enlevant simplement les mailles lisières et tricotant des mailles endroits à la place des mailles envers?
Merci d’avance pour votre réponse.